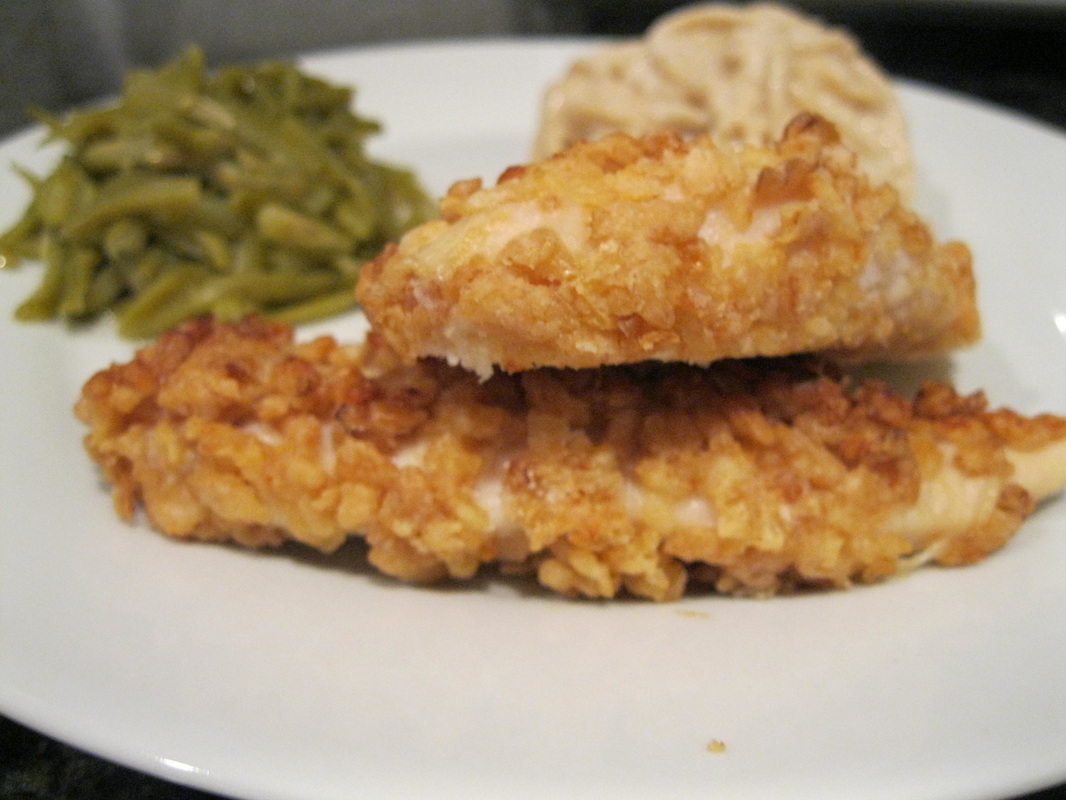
 Very simple, and just packed with flavor, even the pickiest like this one!
4 chicken breast fillets 1/2 cup unmelted butter or margarine 1/2 cup melted butter or margarine 1 Tbsp Worcestershire Sauce 1 Tbsp Mustard Salt and Pepper to taste 2 (3oz) cans of French Fried onions Preheat oven to 350 degrees. Put a 9x9 baking dish in to preheat with the 1/2 unmelted butter. Rinse chicken and pat dry. Pound with a meat mallet to flatten. Combine the 1/2 melted butter, Worcestershire sauce, mustard, salt and pepper in a small bowl and mix well. Put the onions in another bowl. Dip chicken in butter mixture, then coat well with the onions. Arrange in the preheated pan, drizzling with any remaining butter mixture. Bake for 30 minutes or until done in the middle.
6 Comments
 **I was not paid for this review! I received this product heavily discounted for my honest opinion!** As a mom to a six year old roughhousing boy, I've had my fair share of fever watches with him! I'm used to having one of those old school mercury thermometers that take ten minutes to get a reading. This digital thermometer is so quick and easy, it's going to save so much time!
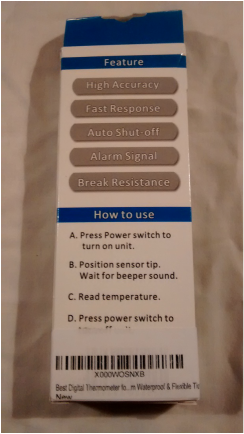
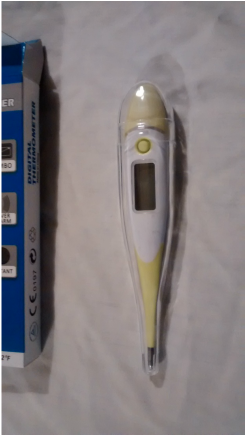
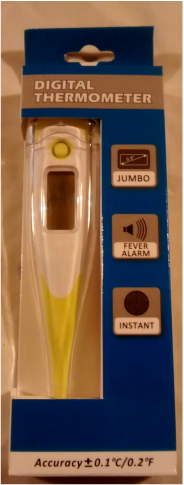
The instructions on the box were very clear and simple, and it also came with additional instructions inside the box. The thermometer came in a neat little clear plastic case that help to keep it sanitary. The thermometer itself is very sleek looking and has a soft rubber tip for maximum comfort. I loved the design of this! It has a quick read time, beeps when it's done reading, and have a fever alarm on it as well! 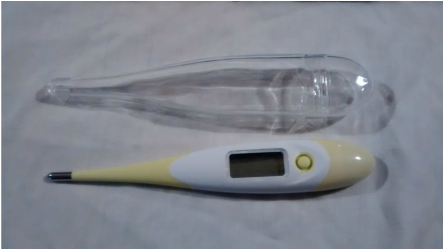 Once I removed it from the clear case and powered it on, it was immediately ready to use. However, I did notice that it was set to Celsius by default. following the handy instructions, I turned it off and held the power button for four seconds. Once I turned it back on, it was set to Fahrenheit. I tested it on myself and my son, and it seemed to have a few really low readings at first. Since it was cold outside and we just came from there, I gave it a few more tries. 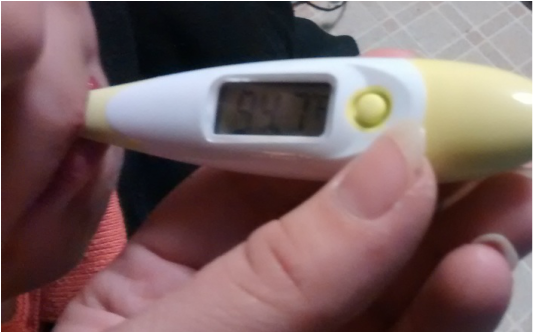 Once I got it warmed up, it read our temperatures just fine! I waited a while and tried it a few more times, and I got accurate reading the rest of the time. This thermometer is very fast, it only takes about 10 seconds, and it beeps whenever it's done reading. Since nobody has a fever, we didn't get to try out the fever alarm (can't say I'm too bummed about that right now though!) 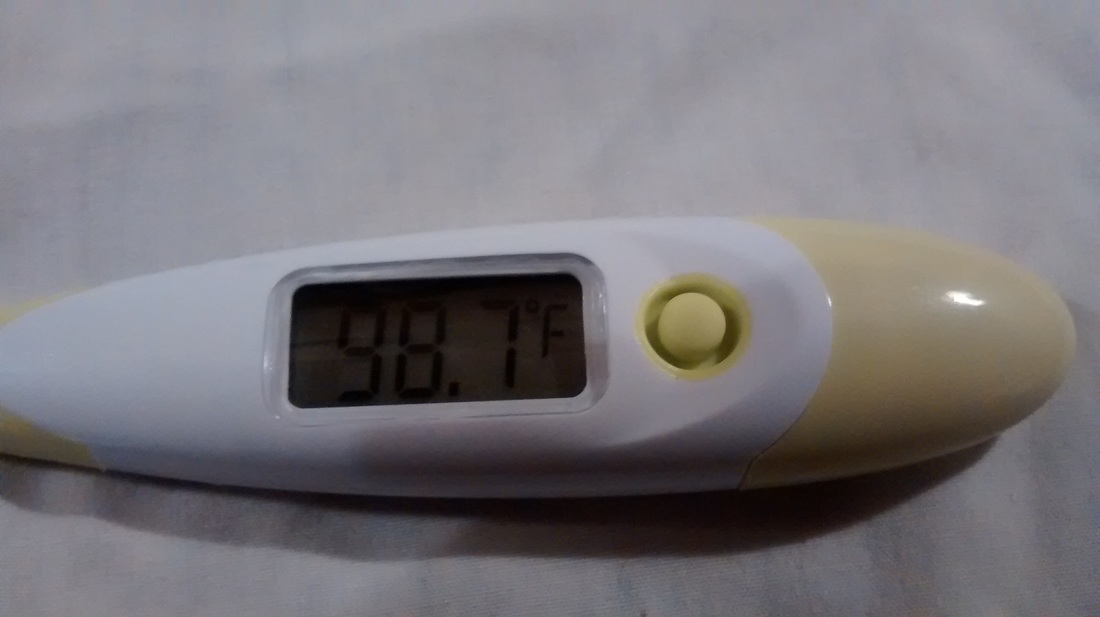 Overall, I was very impressed with how easy this thermometer was to use! I love the sleek design, and I love the neat little case it came with. I'm sure this is going to become one of my favorite items in the medicine cabinet!
 These go great with some steamed rice! Very easy to make, and tastes like restaurant quality!
2 Tbsp butter 2 Tbsp Olive Oil 2 garlic cloves, minced 1-1/2 lbs medium shrimp, peels and deveined 3 Tbsp Tequila 1-1/2 Tbsp lime juice 1/2 tsp salt 1/2 tsp Chili Powder 4 Tbsp coarsely chopped Cilantro Heat butter and oil on medium heat. Add garlic and shrimp. Cook about 2 minutes, stirring frequently. Stir in tequila, lime juice, salt and chili powder. Cook 2 more minutes, stirring frequently, until shrimp are pink and glazed. Toss in cilantro and serve over hot steamed rice. 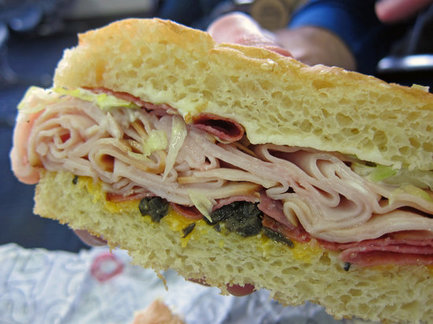 This recipe tastes exactly like Schlotzsky's Deli Bread! Fill with your favorite lunchmeats, cheese and veggies, and you're in for an all-star lunch or dinner!
Pam spray Saran wrap 5 ovenproof, panm sprayed, cornmeal dusted soup bowl, 5" in diameter 1/2 cup warm water 1 Tbsp granulated sugar 1 package RapidRise dry yeast 3/4 cup very warm milk 1/2 tsp salt 1/4 tsp baking soda softened in 1 Tbsp water 2-1/2 cups all-purpose flour In a large mixing bowl, combine warm water, sugar and yeast. Let sit for about 5 minutes until very bubbly. With wire whisk, gradually add the flour in small bits until completely mixed.It will be thick and sticky. Divide the dough between the 5 prepared soup bowls. Spray the tops of each with Pam and cover with a piece of Saran wrap. Let rise almost an hour or until above the rim of the soup bowls. Discard Saran wrap pieces. Preheat oven to 375 degrees. Bake on center rack of oven about 20 minutes or until golden brown. Let cool in containers on wire rack, spraying the tops of each with Pam to keep soft. Turn bowls upside down to remove bread. To use for sandwiches: Slice in half horizontally and grill on a lightly buttered hot griddle or toast in broiler til golden. Fill with your favorite sandwich fixings, and enjoy! 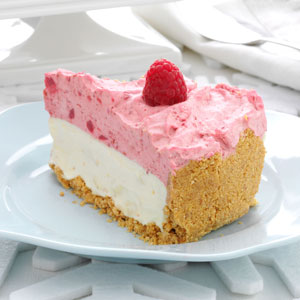 This is so delicious and a true winner for Valentine's Day!
1 prepared graham cracker pie crust (you can also use chocolate!) Filling: 1 lb cream cheese, softened 1/2 cup granulated sugar 2 eggs 1/2 tsp vanilla extract Raspberry Mousse: 1-1/2 tsp gelatin (Plain or Raspberry flavored) 1-1/2 Tbsp cold water 1/2 cup raspberry preserves 2 Tbsp granulated sugar 1 cup heavy whipping cream Preheat oven to 325 degrees. For the Filling: Cream the cream cheese, sugar, eggs and vanilla extract until thoroughly blended. Pour into the prepared crust. Place on a baking sheet and bake for 25 minutes. Cool and put in fridge to cool completely. For the Mousse: Sprinkle gelatin over cold water, stir and let sit one minute. Microwave on high for 30 seconds or until gelatin is completely dissolved.. Combine gelatin with preserves. Chill 10 minutes. Whip cream until soft peaks form. Add 2 Tbsp of sugar and continue whipping until stiff peaks form. Measure out 1-1/2 cups of whipped cream for mousse and set aside. Refrigerate remainder of cream for topping. Gently fold raspberry mixture into measured whipped cream. Spread raspberry mousse on top of chilled cheesecake, mounding slightly in the center. Chill 1 hour before serving. To serve, cut cheesecake into desired servings and top each piece with a dollop of reserved whipped cream. 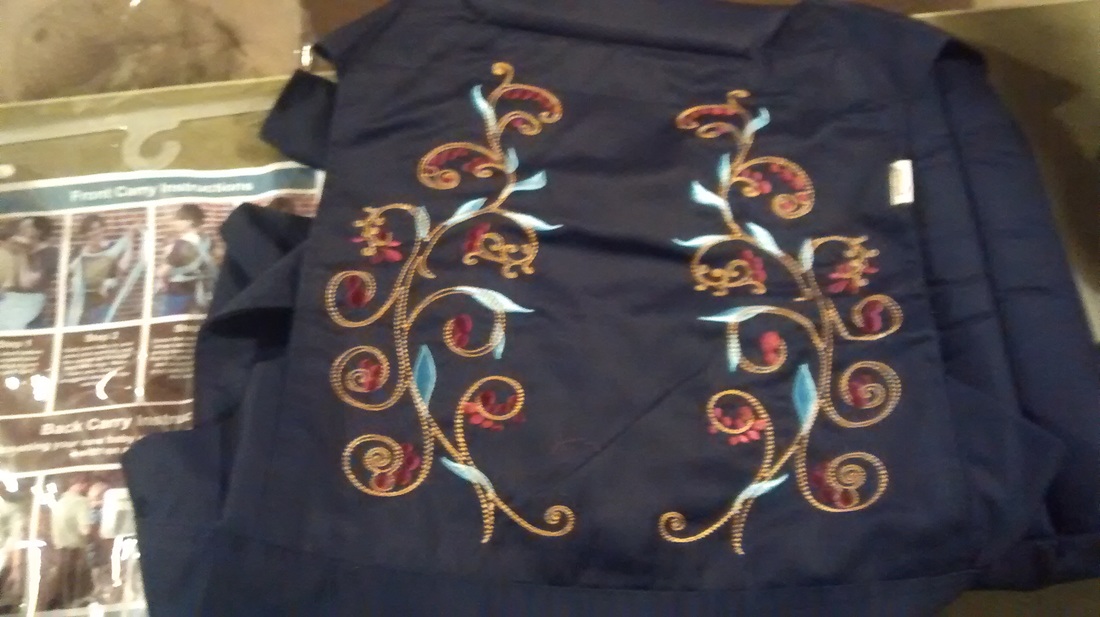
Yes. **I was not paid for this review! I received this product free of charge and all opinions are my own!**
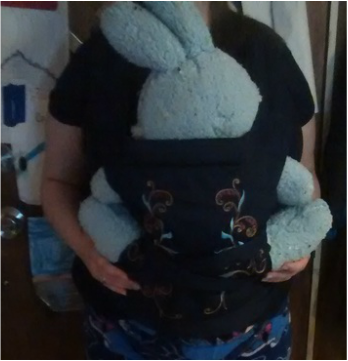
I'm currently 5 months pregnant with my second lil boy, so I jumped at the chance to review this adorable baby carrier! Since my first son is six and he's a little too big to put in here, I got creative and used one of his large stuffed bunnies that's about the same size as a small toddler. Yes. I know. The bunny looks silly. 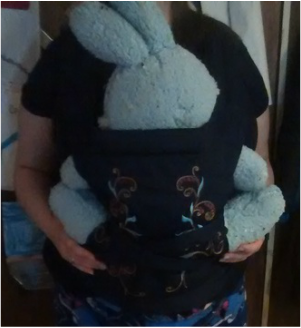
Once I opened the package and saw the gorgeous embroidery on it, my heart just melted! It truly is just beautiful!! The Cozitot carrier is a versatile tie on style, one-size-fits-all carrier. It helps keep your hands free while you support your baby and can support up to 35 lbs! I used to have a carrier when my first son was a tiny tot, and it didn't look anywhere as neat or as comfortable as this one!
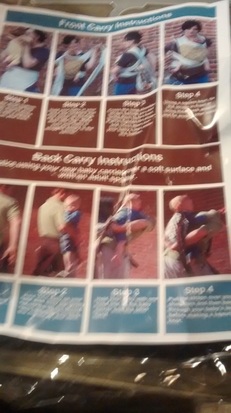
The instructions were very well described with very detailed instructions including step by step pictures. The first time i put it on, it was a breeze and actually simpler than I thought! There's no buckles or velcro, it just has long ties that you wrap around and tie and ended up being quite comfortable. The material the carrier is made of is actually nice and thick and seems VERY durable, it's 100% cotton, so it's very breathable too!
To put on, front carry, you basically start off by tying the bottom straps around your waist. Then you hold on to your baby while you pull the back of the carrier up and pull the front straps over your shoulders. Cross the straps behind you, bring around to the front and cross under your baby's bottom and then tie them back around your waist. Well, as I mentioned, I am 5 months pregnant and getting a little belly, so I ended up tying the ends up front over my belly. It sounds a lot more complicated than it really is! The pictures really helped, and I got it on the first try. To carry in the back, you basically do the same procedure. It really is pretty simple to do!
Overall, I am very impressed with this carrier! It seems very durable and very adorable! I absolutely love the stitched pattern!! I can't wait til my lil one is here so I can carry him around in it! I am completely head over heels for this cute carrier! (Yes. I know. The bunny looks silly.) Once the baby is here, I'll update with some better pics!
If you'd like to get one of these for yourself, they're available here: http://www.amazon.com/dp/B015HO0OFO #CozitotBabySlingCarrier 
**I was not paid for this review! I received these free of charge, all opinions are my own!**
Last week, my husband was the victim of credit card theft! We found out when his card was denied at the gas station at the worst possible moment. Once he looked at his account on his phone, it showed a few purchases in Austin, a city 45 minutes away from us. Well, we haven't been there in about 3 months! His card was shut down, and we had to apply for a new one. It was a huge hassle! So, somehow his card information was stolen right out of his wallet without it ever leaving his possession! How the heck does that even happen?!?! We have suspicions about when we purchased some lumber, the checkout girl had a friend sitting there on her phone. We believe that's when the theft happened since that was the last purchase my husband made before charges started showing up in Austin. So, somehow this girl stole his card info from 5 feet away! When I was given the opportunity to try these nifty RFID card protectors out, I just about tripped over myself to go order them! Once the new card comes in, we're definitely keeping it in one of these! You really don't know how much you use your card in everyday life until you don't have it! It's a true pain!
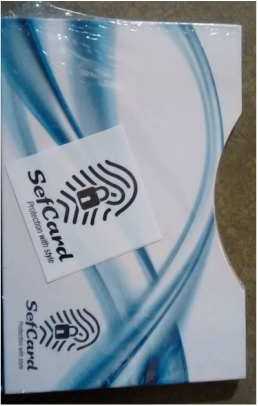
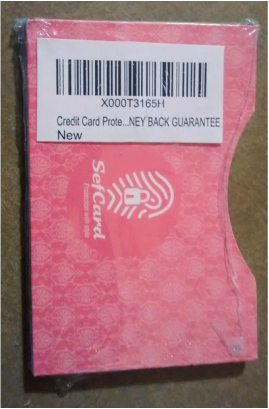
Honestly, when I first opened the shipping box, I thought it was empty! They used a huge box and then taped this tiny credit card sized pack to a big piece of cardboard. They really could've saved some money just putting it in a regular sized envelope or something.
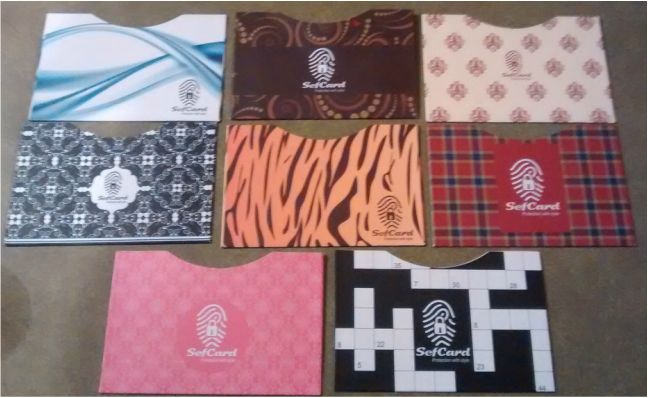
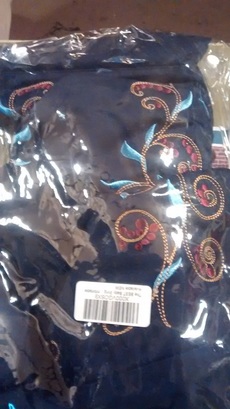
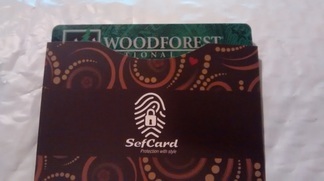
Once I unwrapped them,all I thought they were all too cute! As you can see, they're in a wide variety of designs that will fit anybody's style. There's a few that are a little feminine, but my husband will be happy to have any except the pink and the tiger striped one (which are my favorites!).
The outside seems to be a light cardboard type material, while the inside seems coated with some kind of aluminum type material.
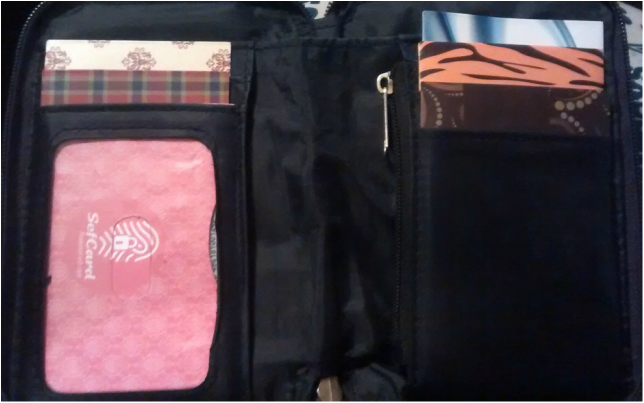
I loaded all my cards in my wallet up in them, and they all fit very nicely! It looks pretty cute too! Overall I'm pretty impressed with how slim and nice looking they are. As if to they work or not, well time can only tell! But they sure look cute, and I feel a little more secure knowing that somethings guarding my cards now! I still don't get how someone can steal my card information without ever seeing the card, but I know firsthand that it's entirely possible!! Hopefully these nifty little cardholders can guard them now!
If you'd like to protect yourself too, you can get them here: http://amzn.to/1PiIOSi #sefcard 
**I was not paid for this review! I received this item free of charge and all opinions are my own!**
I was given the unique opportunity to review this awesome Moscow Mule copper mug. Apparently, these cool mugs have a unique backstory to them! (Quoted from the box)The "Moscow Mule" is actually an alcoholic cocktail that was invented in 1941 by John A. Morgan, president of Cock N' Bull products and restaurant; John G. Martin , president of G.F. Heublein Brother Inc. ,and the third was Rudolph Kunett, president of the Pierre Smirnoff. In 2012, a Moscow Mule kit that included Cock N' Bull Ginger Beer was included as part of Oprah Winfrey's Favorite Things list! The Wall Street Journal published an article about the rampant disappearance of the unique copper mugs from local bars. The situation was so bad that bartenders were holding the ID's and credit cards of customers so they didn't steal the unique mugs. The Moscow Mule is an all-around great drink. It's gingery kick makes it warming in winter, yet the lime flavor makes it refreshing in hot weather too!
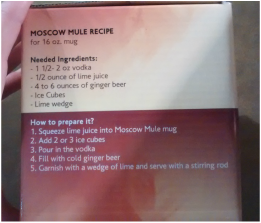
On the side of the box, it had the above history as well as the original Moscow Mule recipe!
Moscow Mule Recipe (for 16 oz mug) 1-1/2 -2 oz vodka 1/2 oz lime juice 4-6 oz of ginger beer ice cubes lime wedge Squeeze lime juice into Moscow Mule mug. Add 2 or 3 ice cubes. Pour in the Vodka. Fill with cold ginger beer. Garnish with a wedge of lime and serve with a stirring rod. 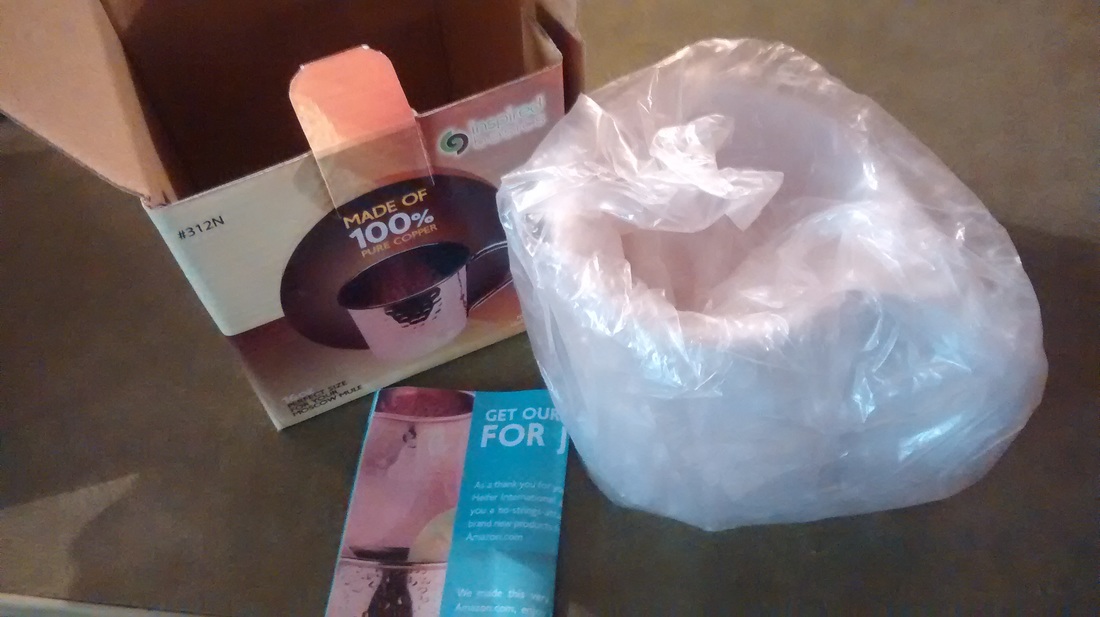
When I unpacked the mug, I was impressed with how well packaged it was! It was wrapped in tissue paper, wrapped inside of bubble wrap, wrapped inside a plastic bag! That shows me that they care about how the mug gets to you!
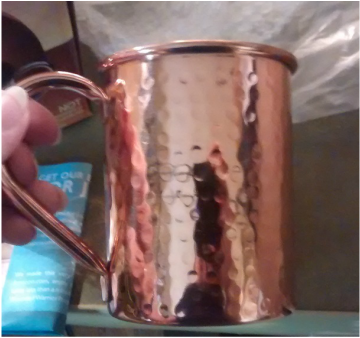
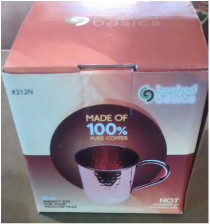
Once I got it all unwrapped, I was definitely impressed with how shiny and beautiful it was! It was almost glowing and just lovely! The Moscow Mule Mug is made of 100% pure copper and it really is just beautiful! It is NOT microwave or dishwasher safe however!
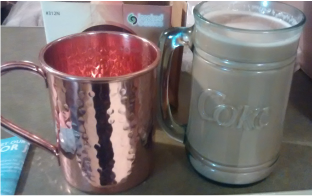
Since it was the morning time, and I'm currently pregnant, I decided to try out my morning coffee in it. I have my favorite glass Coke mug that I love since it's larger than a regular mug. As you can see, compared next to each other, it looks bigger. However, when I transferred the coffee to the Moscow Mule Mug, it filled it perfectly! OK, I'm officially in love with it now!

It held the heat of my coffee great for a while, though I think it'd work a lot better with cold drinks. I absolutely love this beautiful mug, and believe it's my new morning favorite!
If you'd like to get one for yourself, they're available here: http://www.amztk.com/verticalmug #coppermug  About the book:
A master storyteller, Stephen R. Donaldson established a worldwide reputation with his unforgettable, critically acclaimed fantasy series The Chronicles Of Thomas Covenant. Then, with The Real Story and Forbidden Knowledge, he launched a thrilling new science fiction series. Now the galactic epic continues as humanity struggles against the forces of ultimate evil--and its own dark nature. The stage is set of confrontation at Billingate--illegal shipyard, haven for pirates and brigands, where every vice flourishes and every appetite can be sated. Gateway to the alien realm of the Amnion, the shipyard is a clearinghouse for all they require to fulfill their mutagenic plans against humanity. It is here that the fate of Morn Hyland is to be decided amid a kaleidoscopic whirl of plot and counterplot, treachery and betrayal. As schemes unravel to reveal yet deeper designs, Morn, Nick, Angus' lives may all be forfeit as pawns in the titanic game played our between Warden Dios, dedicated director of the UMC Police, and the Dragon, greed-driven ruler of the UMC. Here, the future of humankind hangs on the uncertain fortune of Morn Hyland in a daring novel of epic power and suspense, relentlessly gripping from first page to last. My thoughts: Absolutely absorbing! The series really gets a lot more complex in this third novel, expanding to many more characters and devious plots. While the first book was quite a bit randy, and the second a little racy, this one isn't spicy like that at all. The characters are far more developed than ever before. The storyline is utterly absorbing and its a roller coaster of plots and twists. I am completely hypnotized by this series and can't wait to absorb the next book now! It's definitely becoming one of my beloved series on my bookshelf! 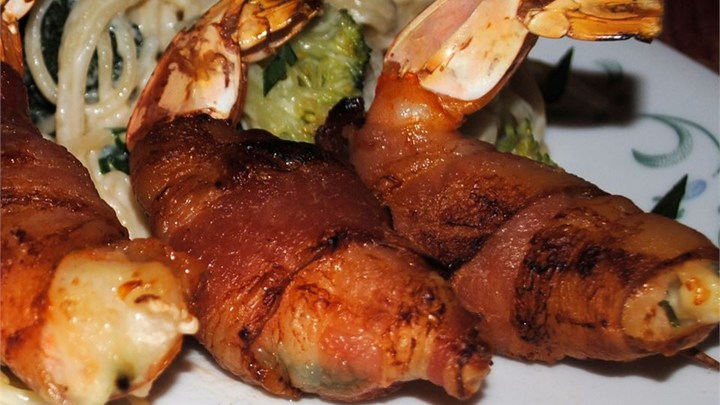 This is a favorite of mine to make whenever we BBQ on the weekends! Goes awesome with steaks.
2 fresh jalapeno peppers 8 medium sized shrimp, peeled, deveined and cooked 8 strips of bacon sour cream Cut tops off of jalapeno peppers and remove seeds. Slice each jalapeno into 4 long strips. You can do them smaller if you don't like it so hot. Cut a slit into the back of each shrimp where it was deveined. Place a slice of jalapeno in each slit and then cover with cream cheese. Not too much, or it melts out! I like to microwave the bacon for a minute so that its halfway cooked. Wrap bacon around each shrimp, securing in place with a toothpick. Grill until bacon is nice and crispy. Watch for flare-ups on the grill or else you'll burn some bacon! |

About MeI'm a Texas gal with a wonderful husband, an amazing six year old son, and an adorable newborn baby boy! Archives
June 2016
Categories
All
Follow Me! |